What is XAMPP?
XAMPP is an open-source, cross-platform web server that consists of a web server, MySQL database engine, and PHP and Perl programming packages. It is compiled and maintained by Apache. It allows users to create WordPress websites online using a local web server on their computer. It supports Windows, Linux, and Mac.
It is compiled and maintained by apache. The acronym XAMPP stands for;
X – [cross platform operating systems] meaning it can run on any OS Mac OX, Windows, Linux, etc.
A – Apache – this is the web server software.
M – MySQL – Database.
P – PHP
P – Perl – scripting language
Why use XAMPP?
XAMPP provides an easy-to-use control panel to manage Apache, MySQL, and other programs without using commands. To use PHP, we need to install Apache and MySQL. It’s not easy to install Apache and configure it as it needs to be set up and integrated with PHP and Perl, among other things. XAMPP deals with all the complexity to set up and integrate Apache with PHP and Perl.
Unlike Java which runs with the Java SDK only, PHP requires a web server to work.
In this XAMPP Tutorial, you will learn-
What is XAMPP?
Why use XAMPP?
How to Download and Install XAMPP
Basic XAMPP Web Server Configuration
XAMPP Control Panel
Configure XAMPP
What is the best PHP IDE?
Introduction to Netbeans IDE
Creating a new PHP project using the Netbeans IDE
Running your first PHP Example
How to Install XAMPP
We look into step by step process to install XAMPP for Windows. For Other Operating Systems, XAMPP installation steps are similar.
Step 1) Download XAMPP
Click here to XAMPP download for Windows: https://www.apachefriends.org/download.html
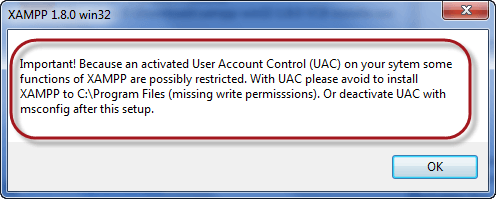
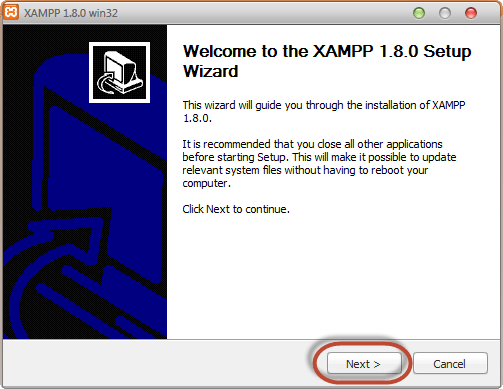
Step 3) Run the Setup
After you have downloaded XAMPP, run the setup. The warning message dialog window shown below appears.
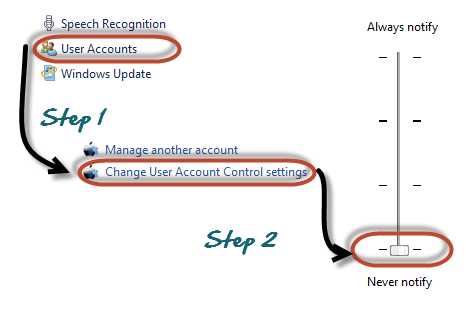
Step 4) Change User Control Settings
If you are using Windows Vista or Windows 7, make sure that you deactivate the User Account Control feature. To do this, Select Control Panel > User Accounts > Change User Access Control settings. The diagram below illustrates the main steps.
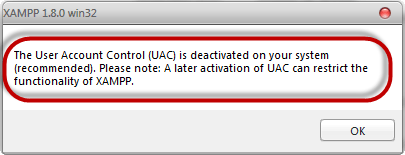
Step 5) Save the settings
- After you have deactivated the User Account Control, click on the OK button on the warning message box.
- This time you get the following message
Step 6) Click Next
On the succeeding screen, click next
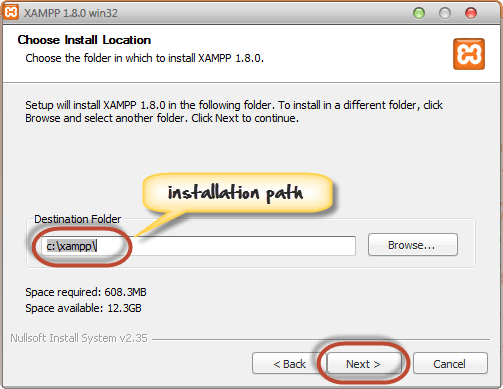
Step 7) Choose the Installation path
In the next screen, Change the installation path if required. Click Next
Step 8) Check the necessary services
On the next screen select Apache and MySQL. You may optionally select FileZilla (FTP Client) if needed. Click Install
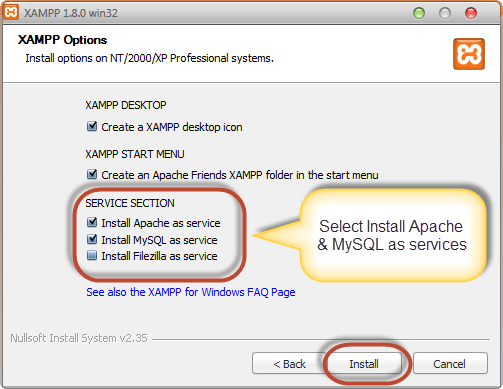
Note a service is a long-running program in windows that does not require user intervention. Services can be set to run automatically whenever the windows operating system is started. For you to use Apache and MySQL, they are supposed to be running in the background. Installing them as services run both Apache and MySQL automatically in the background whenever you power up your computer. If you have not installed Apache and MySQL as services, then you have to manually start them every time that you want to use them. You will have to do this from the XAMPP control panel.PHP and
Step 9) Finish the installation
On successful completion of installation, you will see the following window
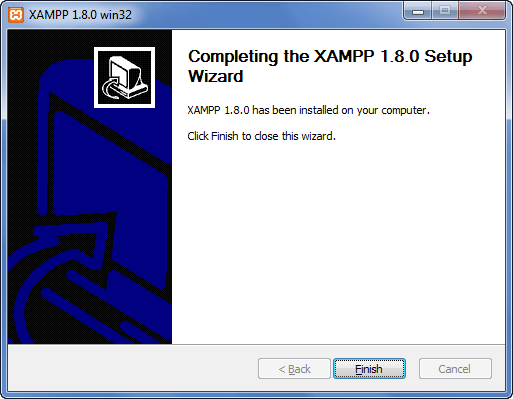
- Click on the Finish button
Before we test our XAMPP installation, let’s first look at the basic directories that we will be working with.
Basic XAMPP Web Server Configuration
This XAMPP Tutorial assumes that you have installed XAMPP on drive C in Windows using the steps mentioned above. The following is a list of the basic directories that you are supposed to be aware of.
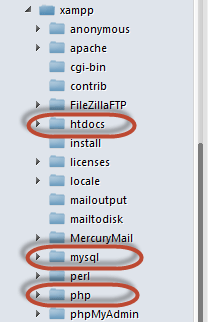
- htdocs; this is the web root directory. All of our PHP codes will be placed in this directory.
- mysql – this directory contains all the information related to the MySQL database engine, by default it runs on port 3306.
- php – this directory contains PHP installation files. It contains an important file named php.ini. This directory is used to configure how PHP behaves on your server.
By default, the Apache web server runs on port 80. If port 80 is taken by another web server, you can use a different port number. For this tutorial, we will assume we are using port 80. Note, If you use SKYPE, it uses the same port. Close Skype if you want to use XAMPP for PHP on port 80
XAMPP Control Panel
The control panel is used to manage programs installed via XAMPP. To open the XAMPP Server control panel,
- Click on the start menu
- Explore the program’s directory and locate Apace Friends and then XAMPP as shown in the diagram below

The diagram below shows the control panel.
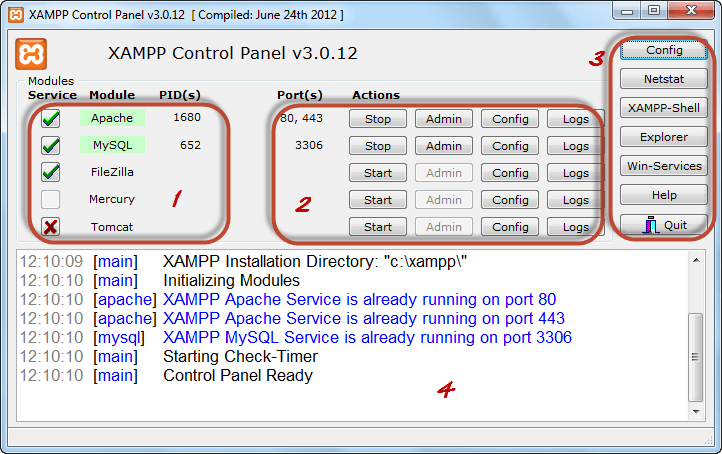
1) This section lists the installed services, modules and the process IDs PID(s). A green tick means the module has been installed as a service. The red mark means it has not been installed as a service. To install a service, click on the red mark. If the button shows a green tick and you click on it, the control panel will ask you if you want to uninstall the system.
2) This section shows the Port(s) associated with the modules. The actions section is for;
- starting and stopping modules
- Open the administrative windows for Apache and MySQL
- Open configuration files for Apache, MySQL, etc. to make changes
- View log files for the modules
3) This section contains useful utilities such as Netsat, windows services shortcuts, etc.
4) This section displays status information on the modules. The control panel can be used to;
- Install and uninstall services such as Apache, MySQL, etc. that are installed via XAMPP
- Start and stop services.
- Open configure files etc.
Configure XAMPP
Let’s now look at the basic configurations required before we start using our XAMPP installation for developing PHP-powered websites. Type the URL http://localhost/xampp/ in your favorite browser. For this tutorial, we will be using Firefox as our web browser.
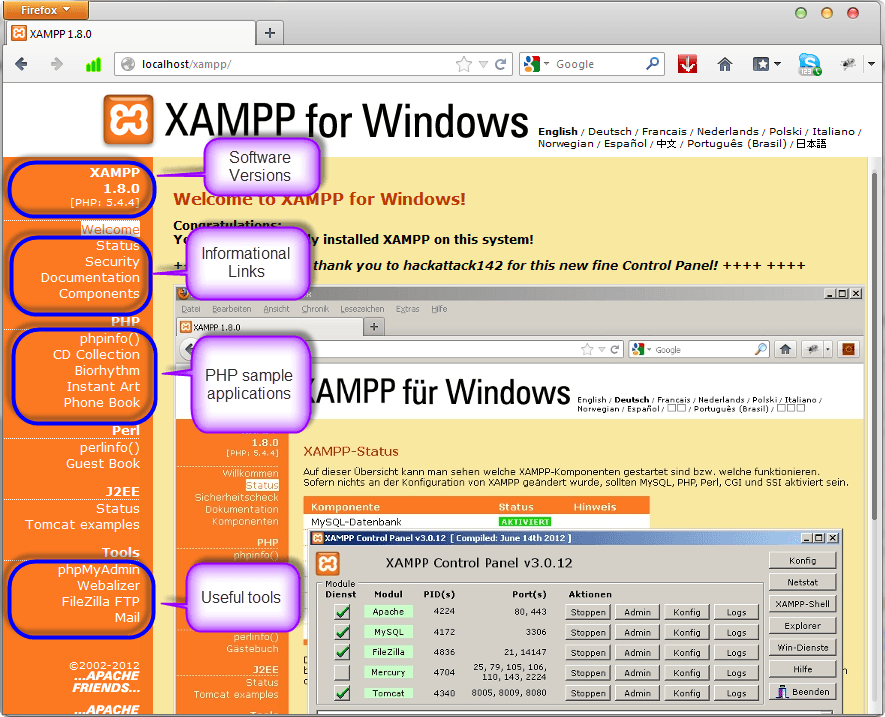
If you are able to see the above screen then you have installed XAMPP successfully. The panel on the left-hand side contains links to useful information such as;
- The version of PHP installed
- Security settings of XAMPP
- Access to utilities such as phpMyAdmin etc.